Step-by-step instructions on how to make your own ClipArt in PowerPoint for free. Learn not only how to create ClipArt, but also to save it as a PNG or vector (EMF) image to use in other programs, like Microsoft Word, Photoshop, and more.
Below is a short 2-part video series (under 5 minutes each) or view the step-by-step instructions with screenshot.
Step-by-step Instructions
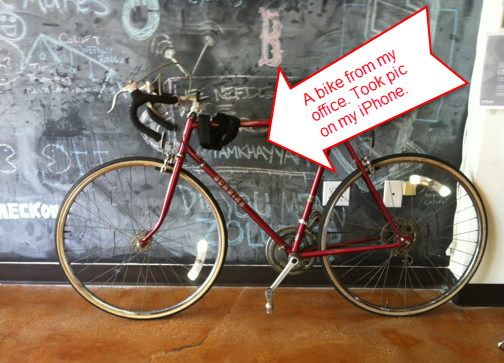
1. Start with a representative picture as your base
In my example, I took a picture of a bike that was in my office.
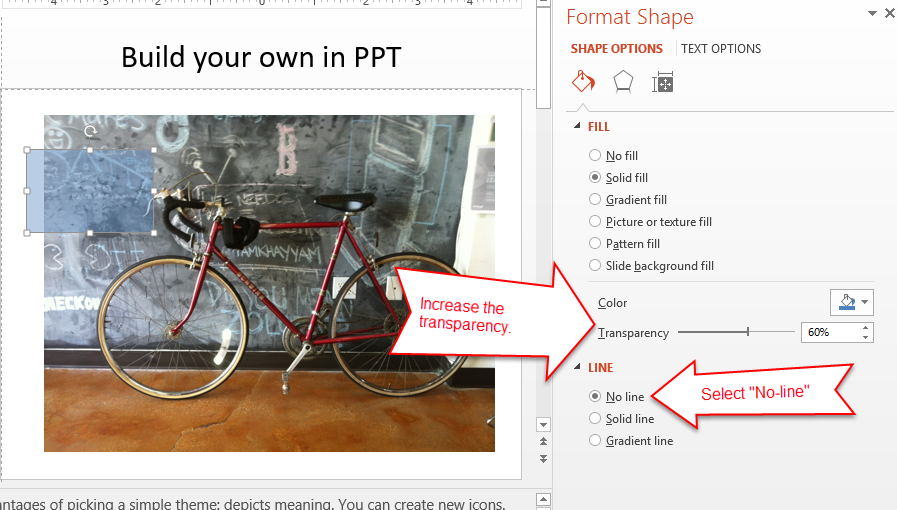
2. Create a semi transparent shape and remove the lines
A semi-transparent shape makes it much easier to trace the image in the next step because you can see the base image below.
To do this, click: insert->shapes->rectangle

Then draw your shape onto the slide, right click on the image->format shape
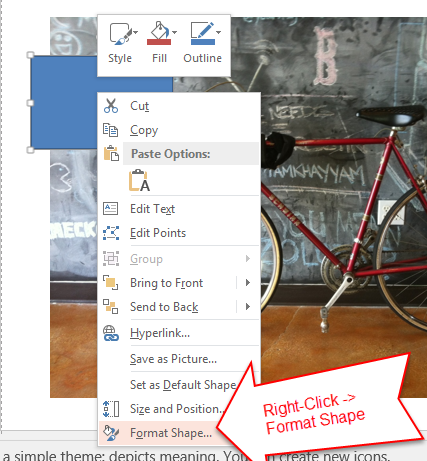
From the format shape window, increase the transparency and remove the line.
Once you have this semi-transparent, outline-free shape, you can now use 2 methods for the rest of your drawings
2A: Copy Format (Ctrl+Shift+C / Ctrl+Shift+V)
If you click on the shape and use the shortcut “Ctrl+Shift+C” you can copy the format of the selected shape, click on another shape and paste the format by using the shortcut “Ctrl+Shift+V”
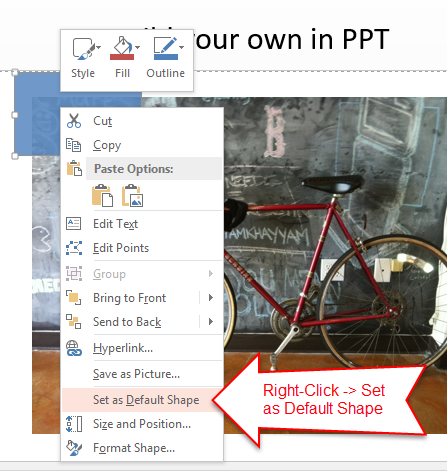
2B: Set the default shape
The other trick you can use is right click, “save as default shape” and everything you draw will have the properties of this shape (instead of that terrible default blue color!!!)
3. Insert shapes to roughly trace the images
Use shapes like rectangles and squares to roughly trace the shapes of the main features. don’t worry about the details for now. You’ll make tweaks in the next steps to make it match the drawing better.
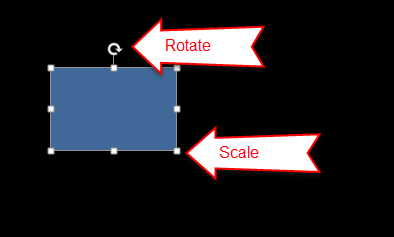
4. Rotate and size/scale shapes to roughly match picture
You can use your mouse to drag the handles to size and scale the shape, as well as adjust the rotation. Again, this doesn’t have to be perfect. We’re going to tweak the shapes in the next step.
5. Modify the shapes for a closer fit
Edit points
This is one of the hidden features of PowerPoint shapes. You can easily modify any shape by turning on the edit points, adding/deleting points, and changing the curves for each. It takes a little bit of playing around to get the hang of it.

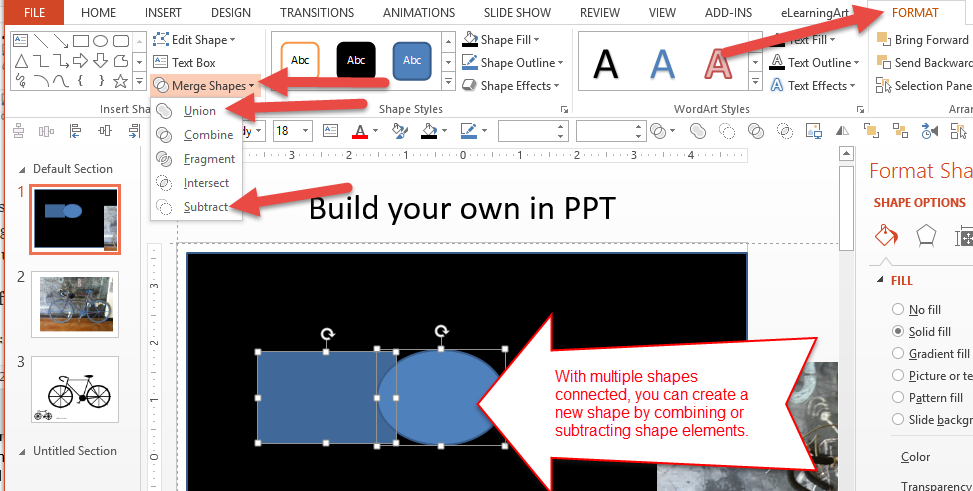
Shape Union / Shape Subtract
Shape union and shape subtract are other awesome hidden feature within PowerPoint. With this feature, you can basically merge two images together (or remove one) to create any shape. Seriously, I think you can design any shape by using this feature.
6. After everything traced, turn off the semi transparency
This step is easy to overlook (like I did in the video tutorial), but if you forget, the image you save out won’t look right. Select all the shapes, and, do the reverse of step 2 and reset the transparency to 0%.
7. Color the shapes
If you’re creating a mono-tone icon or clipart, just select them all and then change the color.
If you want to get fancy with different colors, select the ones you want in each color by Shift+clicking, then change the color.
8. Group the shapes
Select all of the shapes by dragging the mouse over all of the shapes. Right click and “group” or use the shortcut “Ctrl+G” to group the images.
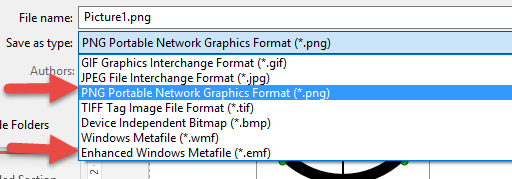
9. Save as an image
Right click and save as image.

I suggest you save it as both a PNG and an EMF (windows vector).
Bonus tips:
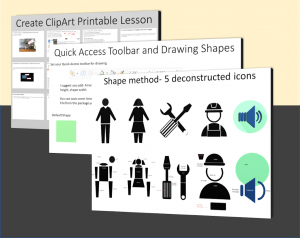
Tip 1: Set up your quick access toolbar for improved drawing.
Tip 2: Pick a simple style when you’re creating your own clipart. Important for a few reasons:
- You can trace from a picture
- If you use a fancy design, you might have to hire a designer to create addition items in this style
- Simple is representitive of the actual object you’re creating
Video Transcript from Part 1 of 2
Hey this is Bryan Jones from eLearningArt. I’m just following up here. This is the second lesson on how to create clipart icons in PowerPoint. What I’ve shown you in the last lesson was how you can kind of trace over an image to create your own, and I ran out of time at the end there, and I felt like it was worthwhile showing you guys a couple of things.
One was how you can save out the icon so. A simple — a simple thing you can do is save it as a PNG, just copy and pasting the picture, or as an EMF. And I also wanted to show you how – why I choose simple style icons as well.
So let me just charge through this really quickly. So one of the things that we need to do is, this was created as a semi-transparent image, so that you can see the picture underneath as we drew it. Well we need to remove that and make it – get rid of the transparency again.
So fill, you’ll see the transparency, let’s go ahead and move that back to zero, and if – don’t forget those spokes were actually lines, so let’s go fix those individually. Or, sorry, as a group here. So let’s click on all of the things that were lines, okay.
Now we can format that, and you’ll see the line color, we had the transparency – I forgot to do that before and it messed up my EMF. So, now the transparency is zero. Now we have this and we can turn it black. So, let’s do the fill color as black for – for that. And let’s make the spokes black too, I could have done that in the last step but I forgot to.
And there we go. So now, you can just copy this, so copy and then you can paste it as a picture, and now it’s just a single object here. But that’s going to be a PNG, you won’t be able to scale it all the way up. The other thing you can do is – let’s get rid of this. Let’s save as picture, and let’s call that – well you can save it as a PNG, but we’re going to do it as – as an EMF.
And we’ll call it bike three. And let me then insert that image, and you see bike three, now it’s actually going to be fully scalable. And, again, now that you’ve saved this out, you can do the same thing with ungrouping. Control shift G, yes, control shift G to ungroup.
Remove this top part and, you know, you can turn – you can turn the bike frame different colors and it gives you some flexibility there. So I hope that helped you out. But one other thing I wanted to tell you is, I think the problem when you go out and you – you find an icon style you like, if you pick something that is complicated, you might get yourself stuck where you’re going to have to hire a graphic designer to do all the editing.
So picking simple styles is – is a good thing to do. So, you know, I really like doing this simple black 2D style where I can then recolor them to fix them. So I have all my people, icons, and navigation, and things that can be landscapes, and web icons, and transportation. And then if I had to go modify some of these, I can do a little bit on my own just with recoloring, or – or drawing a simple object myself like with we just did with that bike there.
I also really like the – the hand-drawn style as well, and this is done as clip art. This is not as easy to re-draw within PowerPoint, but again it’s simple, and if you had to hire somebody to do that you could. So anyways, there’s some advantages to thinking simple things beyond just creating new icons. It’s also, it’s representative of what the object is.
You know, this is a phone and you’re not messing around. This is a bar chart, it’s clear what these things are. So a couple of advantages to picking simple styles, but , you know, it’s a personal preference of what you want to do with the styles you choose.
Hope you found that useful. I have a whole bunch of lessons on clipart, and icons, and recoloring, and animating. So check out eLearningArt.com to see more of those, or – or the YouTube channel that I have. Thanks so much. Have a good day.
Video Script from Part 2 of 2
Hey this is Bryan Jones from eLearningArt. I’m just following up here. This is the second lesson on how to create clipart icons in PowerPoint. What I’ve shown you in the last lesson was how you can kind of trace over an image to create your own, and I ran out of time at the end there, and I felt like it was worthwhile showing you guys a couple of things.
One was how you can save out the icon so. A simple — a simple thing you can do is save it as a PNG, just copy and pasting the picture, or as an EMF. And I also wanted to show you how – why I choose simple style icons as well.
So let me just charge through this really quickly. So one of the things that we need to do is, this was created as a semi-transparent image, so that you can see the picture underneath as we drew it. Well we need to remove that and make it – get rid of the transparency again.
So fill, you’ll see the transparency, let’s go ahead and move that back to zero, and if – don’t forget those spokes were actually lines, so let’s go fix those individually. Or, sorry, as a group here. So let’s click on all of the things that were lines, okay.
Now we can format that, and you’ll see the line color, we had the transparency – I forgot to do that before and it messed up my EMF. So, now the transparency is zero. Now we have this and we can turn it black. So, let’s do the fill color as black for – for that. And let’s make the spokes black too, I could have done that in the last step but I forgot to.
And there we go. So now, you can just copy this, so copy and then you can paste it as a picture, and now it’s just a single object here. But that’s going to be a PNG, you won’t be able to scale it all the way up. The other thing you can do is – let’s get rid of this. Let’s save as picture, and let’s call that – well you can save it as a PNG, but we’re going to do it as – as an EMF.
And we’ll call it bike three. And let me then insert that image, and you see bike three, now it’s actually going to be fully scalable. And, again, now that you’ve saved this out, you can do the same thing with ungrouping. Control shift G, yes, control shift G to ungroup.
Remove this top part and, you know, you can turn – you can turn the bike frame different colors and it gives you some flexibility there. So I hope that helped you out. But one other thing I wanted to tell you is, I think the problem when you go out and you – you find an icon style you like, if you pick something that is complicated, you might get yourself stuck where you’re going to have to hire a graphic designer to do all the editing.
So picking simple styles is – is a good thing to do. So, you know, I really like doing this simple black 2D style where I can then recolor them to fix them. So I have all my people, icons, and navigation, and things that can be landscapes, and web icons, and transportation. And then if I had to go modify some of these, I can do a little bit on my own just with recoloring, or – or drawing a simple object myself like with we just did with that bike there.
I also really like the – the hand-drawn style as well, and this is done as clip art. This is not as easy to re-draw within PowerPoint, but again it’s simple, and if you had to hire somebody to do that you could. So anyways, there’s some advantages to thinking simple things beyond just creating new icons. It’s also, it’s representative of what the object is.
You know, this is a phone and you’re not messing around. This is a bar chart, it’s clear what these things are. So a couple of advantages to picking simple styles, but , you know, it’s a personal preference of what you want to do with the styles you choose.
Hope you found that useful. I have a whole bunch of lessons on clipart, and icons, and recoloring, and animating. So check out eLearningArt.com to see more of those, or – or the YouTube channel that I have. Thanks so much. Have a good day.