You can incorporate many techniques from film to improve your training
You don’t need a blockbuster movie budget to incorporate some cool techniques from movies. In fact, a lot of what I learn from movies and TV is more about storytelling than special effects. Take the example of the “establishing shot” that my good friend, Dave Richards, from e-Mersion introduced to me. Dave has a background in film and has been producing award-winning eLearning content for years, so I took some good notes, did a little research, provided five examples below, and included some free assets for you to work with as well!
Establishing shots add context to your story
You might not even be aware of it, but establishing shots are used in almost every television show and movie. An establishing shot is the first shot or series of shot can quickly tell your audience where the film takes place without having anyone in it announce the location.
Below are five ways I like to use establishing shots with some practical tips to help you incorporate this technique into your training.
Use exterior building shots to set the scene
A good example of establishing shots on television can be seen on “The Simpsons.” Notice how the show often starts its first scene after the opening credits with an establishing shot. It can be of the Simpson home, Moe’s bar, the nuclear power plant, etc. and lets the audience know where the first scene of the show is going to take place.
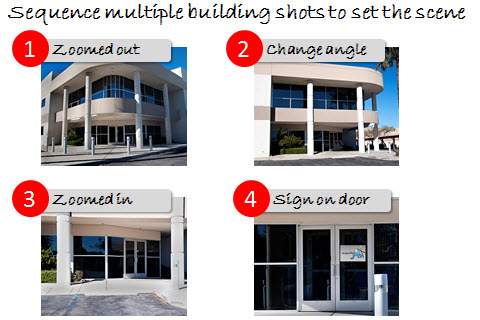
It’s pretty easy to incorporate this into an eLearning course as well. For example, in the example below, I used images of office buildings to establish the scene.
There are a few things that this establishing shot tells me out the upcoming scene. For example, the scene takes place in a medium sized building, it is taking place during the daytime, and, as you can see from the building door, it is the office of eLearningArt (I added the sign in post-production).
When using exterior buildings, I like to take a few different shots: fully zoomed out, a second angle, a medium range zoom, and a close-up of the entry. Here is a quick video showing you how to sequence multiple building shots to establish a scene. If you only have a single shot, I also created a video showing you how to create multiple angles with a single background image.
These sort of exterior establishing shots are very common but by no means the only kind of establishing shot available to filmmakers, as you’ll see below.
Use people and rooms to establish context
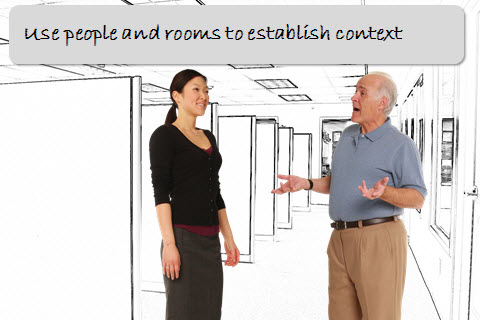
Establishing shots can also be created with indoor photos and people. For example, in the photo above, you can show a two business people in a conversation in the hall before starting the scene. Or, for a different context, I could have shown a large group in a conference room, then zoomed in on two people having a conversation. You can use interior establishing shots for a range of scenarios, such as a crowded restaurant, a surgical arena, industrial space, or a hospital room.
Two effects that I like to use when creating interior establishing shots are creating multiple angles from a single image and showing the background and then bringing the people into the scene. If you don’t do the photo shoot yourself, you’re only likely to find a single image to use. So you’ll want to user a higher resolution version of the image and some zooming and cropping effects to create multiple angles from a single image. I’ve created a video tutorial on how to use a single image to create a scene here. The other effect I like is to show the background first, then bring in the characters. You can see a video of creating character fly-ins for establishing shots here. This effect allow you to set the scene first, then introduce your characters.
Zoom in on a document to deliver a message
Although establishing shots are often done of an entire room or structure in which the scene takes place, they can also be done on specific people or things. For example, an establishing shot of a document in someone’s hands can show the audience that the scene is going to revolve around that particular document.
I find hand-cutouts particularly useful for this task. I’ve included the hand pictured above in the giveaway at the bottom of this post. I’ve also created a video showing how I used this hand to create this scene.
Use first person perspective to show context
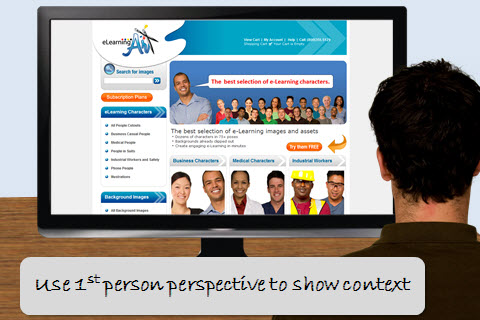
Similar to zooming in on a document, you can also zoom in on a screen or show the scene from the perspective of a character. In the example above, I have Ian checking out the eLearningArt website, but you can drop anything you like onto the screen. I think it adds more visual interest than just showing the screen fully zoomed in. I did an earlier post on first person perspective that you can read here. You can also learn more about how I created this desktop scene here.
Let facial expressions set the tone
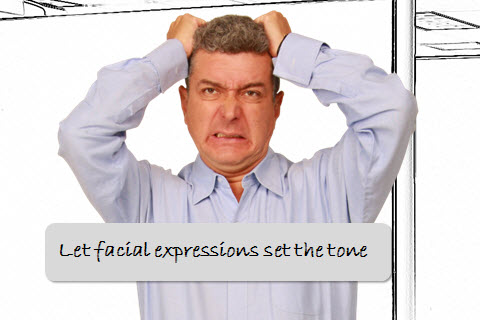
You may have already read my post on using facial expressions to tell stories. And a great place to use a facial expression is at the beginning of a scene. It allows your learner to quickly interpret the tone of the scene. One of the best known such establishing shots is the close-up of the look on Al Pacino’s face in “The Godfather” when he returns from the restaurant restroom with a gun.
In eLearning, if I were creating a course on handling difficult people, I might start with something like the image below.
What emotion are you trying to convey? There is probably a facial expression you can use to convey the right tone.
More examples from the pros
Other famous establishing shots in movies often include shots of entire cities, streets, and even spectacular space ships as in the first scene of “Star Wars.” Both the various television show and film versions of “Star Trek” often show the Enterprise and other Starfleet vessels in their establishing shots. Establishing shots are still commonly used to this day in everything from academy award winning movies to instructional films.
The next time you’re looking to set up a scene, think about how you can incorporate establishing shots to give context to your scenarios whether it is at the beginning, middle, or even end of your film. What is your favorite establishing shot of all time? Tell us in the comments section below.
And what about some free assets?
All of the images from this post and on eLearningArt.com are part of the eLearningArt membership subscription, which is hugely popular with our customers because you get access to our entire library. We hope to have you as a member soon, but always like to reward our blog readers with some free assets. We hope you enjoy the free assets below and found this post useful. Good luck incorporating establishing shots into your next course!
[highlight]You can[dlink link=’https://dl.dropboxusercontent.com/u/2332114/eLearningArt_GiveAways/AssetsBlog/Angles-Film/Angles-Article-Giveaway.zip’] download the images listed below here[/dlink].[/highlight]- Multiple building shots: This is single building from our office building bundle in the background images.
- Hallway background: This hallway is from our indoor office bundle in the background images.
- Hand for holding documents: This image is part of our hand bundle pack.
- Characters from post: A few of the character images I used in this post and part of our people cutout images.


