I’ve recorded hundreds of videos tutorials on my computer.
And I’ve probably made every mistake at some point.
Each time I made a mistake, I improved my process so I wouldn’t make it again.
In the article below, I’m going to share with you my exact setup for creating video screen recordings.
I’ll even give you the downloadable checklist I use when I record my screen.
With those 2 things, you can bypass the mistakes I’ve made and skip ahead to record your screen like a pro.
With that said, let’s start your first screen recording!
1. Before you open any software
1A: Grab an external microphone
You need to use an external microphone for screen recording, not your computer’s built in mic. Why? The built in mic makes you sound like you’re in a tunnel. And bad audio is less tolerable for users than bad video.
You don’t need to get fancy here, especially when getting started. I have a bunch of expensive mics, but often just use a $30 USB headset mic because it’s so easy to just plug it in and go.
1B: Set up your desktop recording area
I don’t like to record “full screen” because it can end up recording at a funky aspect ratio.
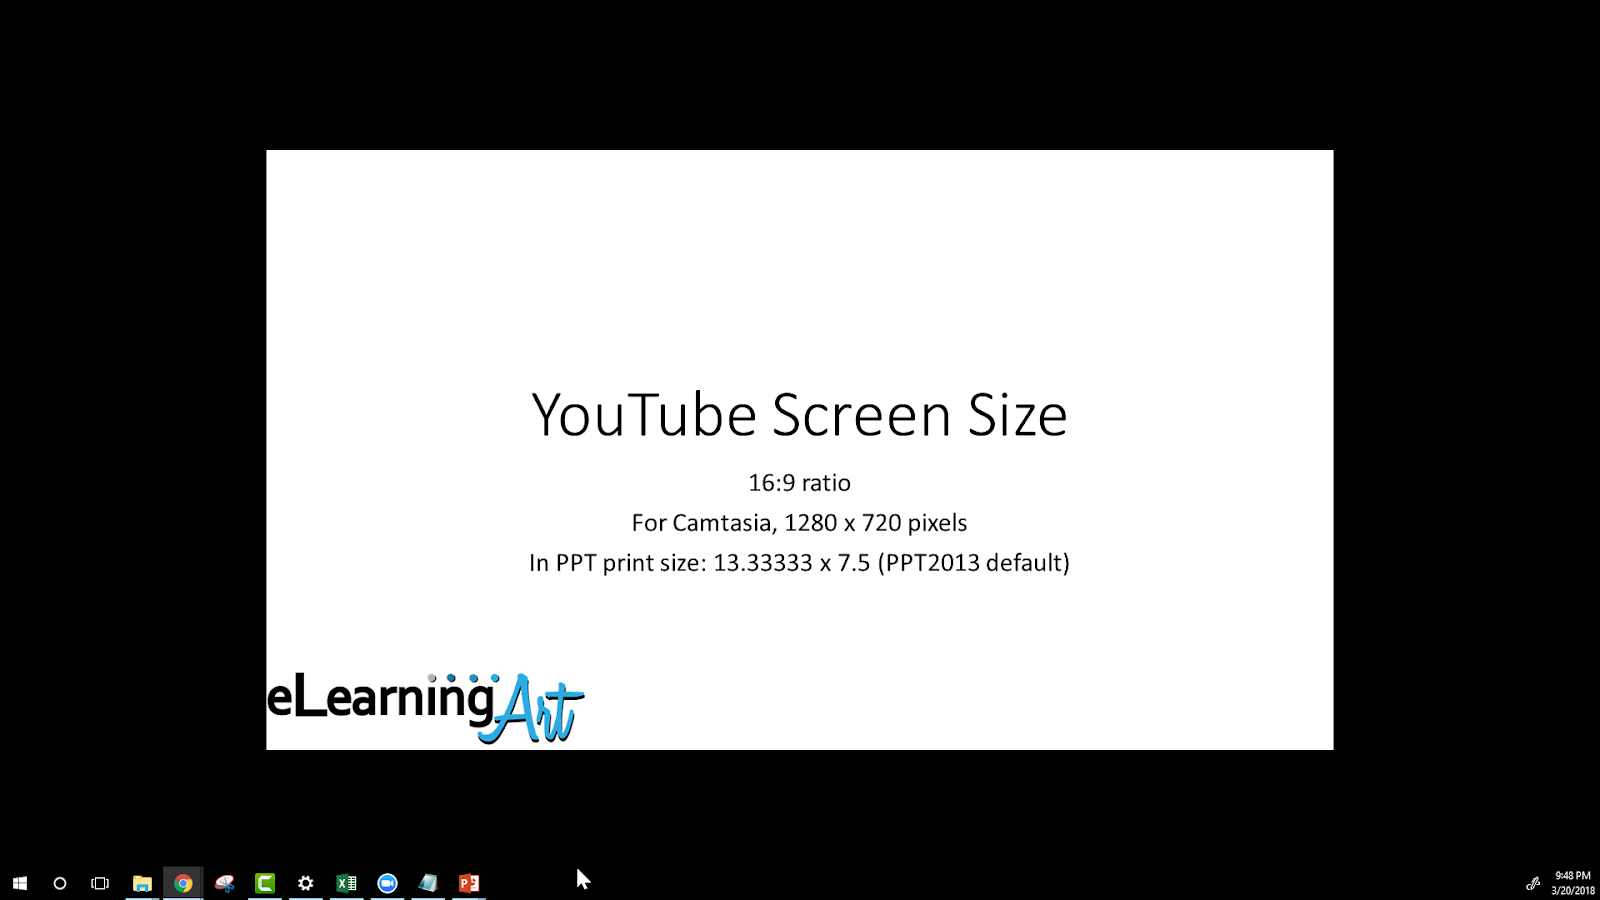
1280 x 720px is a good size to record at. It’s considered HD, but it’s small enough that you can usually fit the entire area within a normal external monitor.
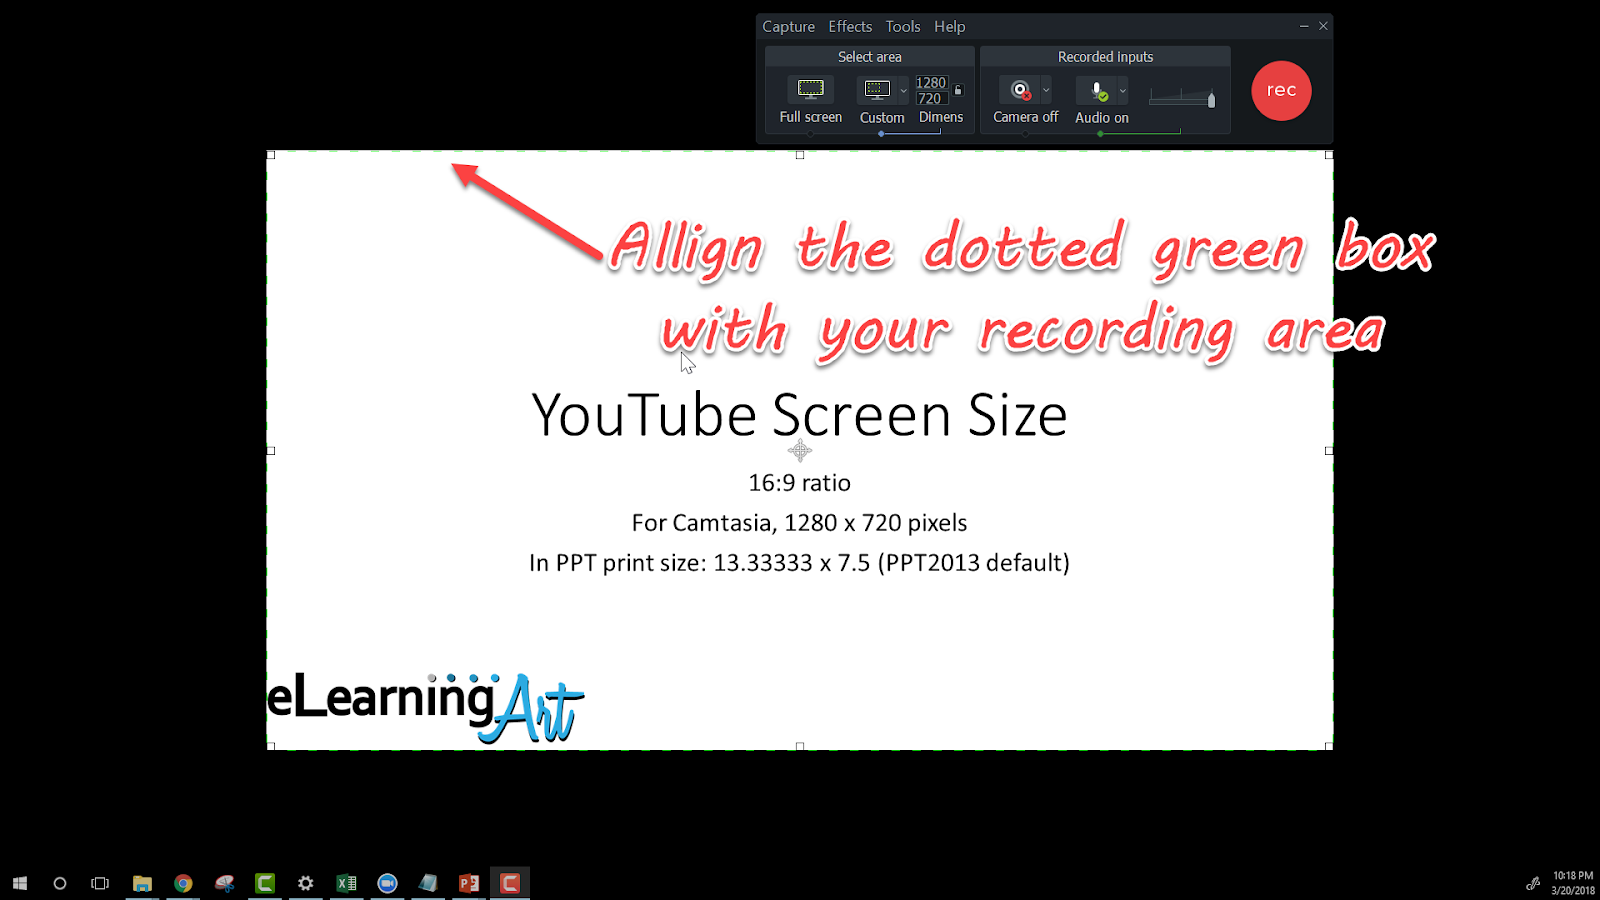
I like to make my desktop background a 1280 x 720 placeholder image. My desktop looks like this:
I’ll then size any software, windows, or browsers within that space to prep before recording (anything in the white above will be recorded. .
And I manually select that as the recording area in Camtasia (as described in step X).
1C: Set up your external environment
Turn off music, fans, etc and find a quiet room
1D: Get in the right headspace
Don’t worry about making mistakes.
The goal here is to create a screen recording without doing 100 takes. And I’ll give you some tips to how to re-record sections without having a zillion different files to manage.
2: Download the free 30-day trial of Camtasia
There are a ton of video screen recording software options (a survey of my eLearning audience had 60 different tools!).
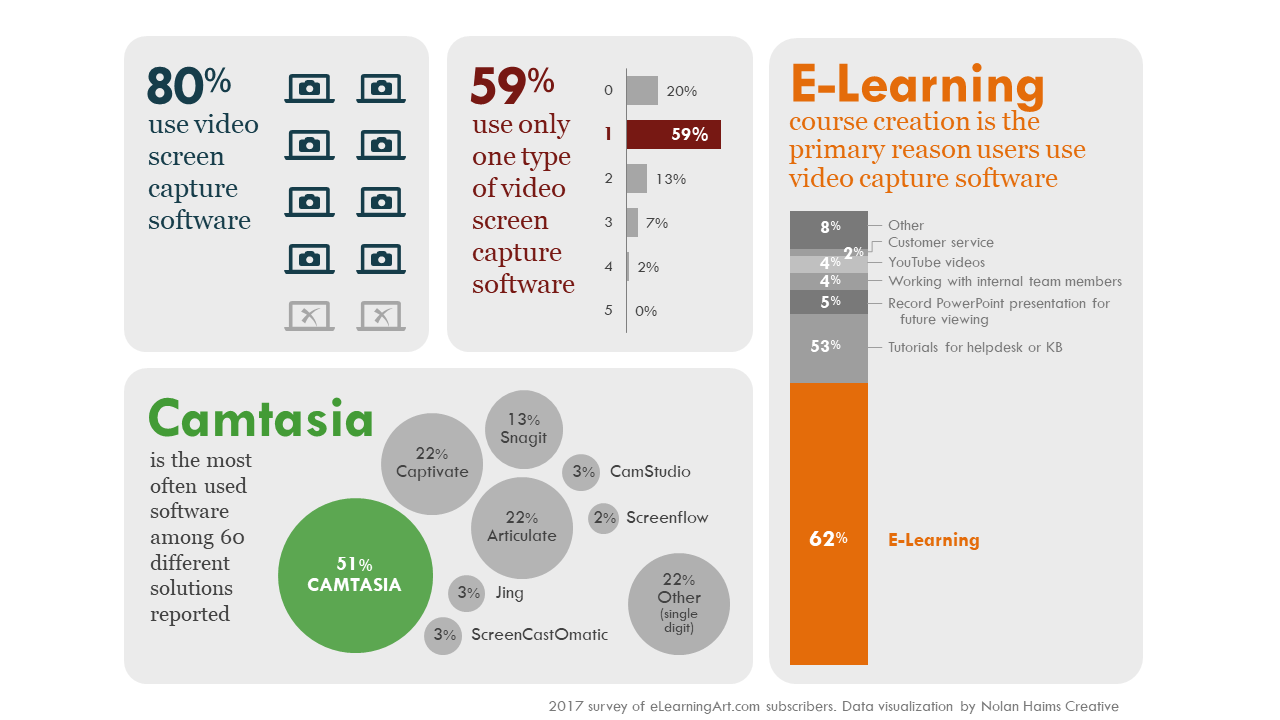
But Camtasia was the #1 video screen recorder by a huge margin (in my survey, 51% of you use Camtasia). So Camtasia is a great place to start.
Here’s some quick summary details that Nolan Haims put together for me from my screen recording survey.
Download a free trial of Camtasia here
Go to the TechSmith Camtasia page – > Click Free trial
Follow the prompts and download the software.
3: Pre-recording setup
3A: Open the Camtasia Recorder
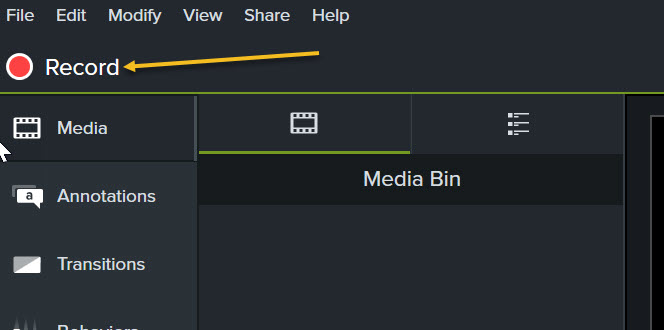
With Camtasia open, click “Record” in the upper left of the screen to launch the “Recorder”
The “Recorder” will open up and looks like this:
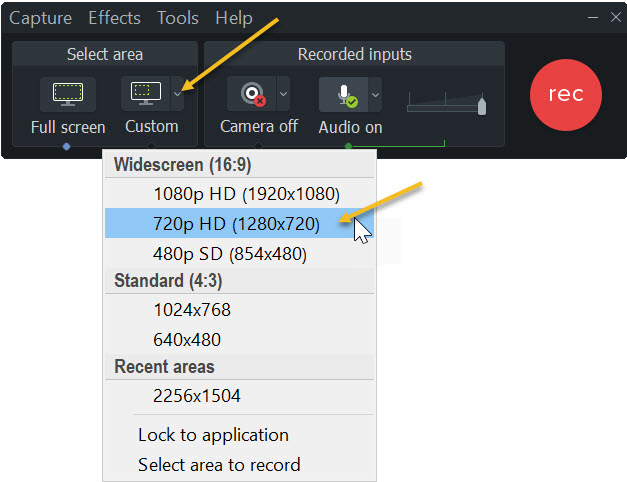
3B: Screen settings: Custom-> 720p HD (1280×720)
Use a monitor large enough to fit 1280×720 resolution.
Select area->custom->Widescreen (16:9)->720p HD (1280×720)
Then drag the green-dotted guides over the image you put on your desktop
Now, anything you put in that area will record. So size the program you want to record to that are
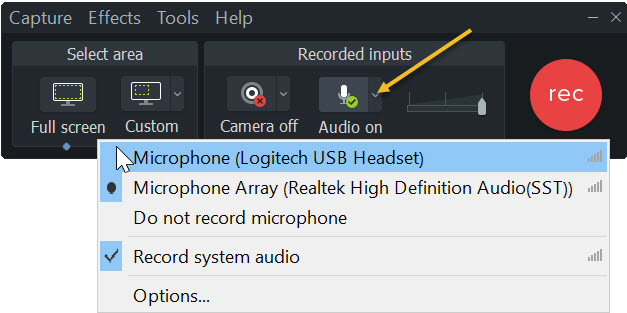
3C: Microphone settings-> Confirm external mic
Don’t forget to switch to the actual mic in Camtasia
I can’t tell you how many times I’ve had an external mic plugged in only to find that after I recorded, the audio sucked because it was actually recording from my built in computer mic.
3D: Review your Camtasia shortcuts (F9: Record/Pause, F10: Stop)
Here are the only 2 shortcuts you need:
- F9: Record/Pause
- F10: Stop
There are sooooo many times I’ve been in the middle of a recording and I want to pause the recording…
To take a break…
To fix something on my screen before continuing…
Or whatever!
Yes, you can clean it up in post production, but if you can avoid recording dead time, it will save you a TON of time in post production.
4: Recording Workflow & Tips
4A: Click record
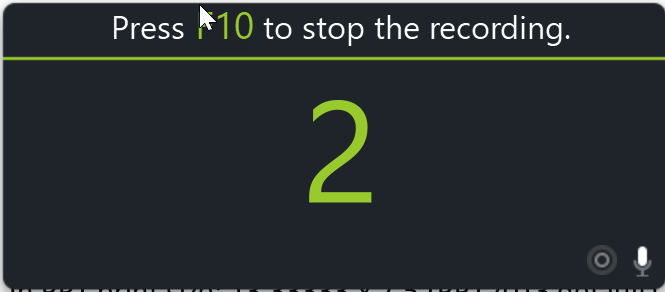
4B: Wait for the countdown timer to go live
(3, 2, 1)
4C: Allow 5 seconds of silence
A big mistake is to start talking and recording your tutorial right away.
Capture 5 seconds of silence before video. This is for 2 reasons:
- Allow a buffer so you don’t cut off anything you meant to record AND
- for future “noise removal” of ambient noise
4D: Begin your tutorial
Run through your tutorial and think out loud in a conversational tone.
Talk about what it is that you’re doing and why.
Don’t worry about making mistakes, fumbling on a few words, clicking on the wrong thing, etc.
You’re human…
And making human mistakes connects with people.
4E: Goal: 1 “take”
If I’m shooting a video that’s going to be less than 10 minutes, my goal is to shoot it in 1 take.
If I need breaks, I take them.
If I make mistakes, I redo that section, but keep the screen recording the whole time.
Creating different files means managing multiple file.
1 take is best.
Here are a few tips…
4F: Break if you need it: F9: Pause/Resume
Sometimes I realize I need to open a different program or find a file on my computer.
Or sometimes I just need a quick break to gather some thoughts.
I’ll hit the F9 shortcut to pause the screen while I do that so I don’t end up with a ton of recorded “dead space.”
4G: Addressing mistakes -> “Triple Tap” and continue
I make a lot of mistakes while I record.
I let the minor ones stand. If I clicked on the wrong thing and then have to go back, no biggie. I talk through the mistake and explain why I made it. That’s helpful too!
If it’s a big mistake that will distract from the learning, I do a quick “triple-tap” on the microphone.
Why?
That marks the spot where I’ll be duplicating part of the lesson.
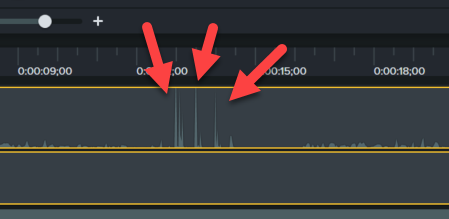
Here’s what a triple-tap looks like in post production:
This makes it easy to know where my restart points are in post production.
4H: 5 seconds of silence at the end
I also record 5 seconds of silence at the end. This time, it’s mostly to be sure I didn’t cut anything off. It also becomes the backup for my “noise removal” process that I may do in post production.
4I: Stop the recording when finished (F10)
I usually just click the stop button on the “Recorder” like this:
But you can also use the F10 shortcut.
4J: Save the “Camtasia Project” file format
You’ll want to save the “camproject” file before you start doing anything else. You don’t want to lose your recording.
5: Post Production
5A: Edit as little as possible
For your first video (and beyond, really) you don’t need to get fancy in post production.
In fact, you should do almost nothing.
Don’t add music or fancy graphics.
Don’t use the zoom feature (although it’s cool).
The Camtasia editing features are pretty powerful, but you can lose not just minutes, but hours, tinkering…
Let’s just make a few adjustments…
5B: Essential adjustments
The beauty of our “1-take” recording is that you now just have a single “clip” in the “bin.” (you don’t even need to know what those are for now!).
There are only 2 things you need to do and only 1 tool you need to use (cut):
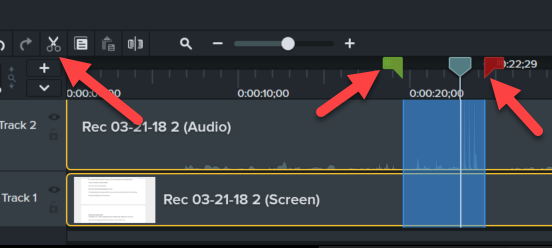
1- Cut out any mistakes during your single “take” by
Dragging the green handle to the start of the mistake and the red to the end (triple-tap)
Then clicking “Cut”
Didn’t make any mistakes? Awesome, you’re almost done then!
2- Cut out the extra silence at the beginning or end
Use the same method as above of dragging the green and red handles, then cutting out the silent section
Note: If you’re doing “noise reduction” do that before cutting the silence
BOOM! You now have your first screen recording tutorial!
Skip ahead to the “Publish Your Video” section if you’re not making any other adjustments…
5C: Nice to have adjustments
In a future post, we can look at these 2 adjustments that I usually make to my videos:
- Noise removal (of ambient noise)
- Volume leveling (and increase)
5D: Advanced adjustments
I rarely add these, but let me know if you’d like to see tutorials about any of these advanced features:
- Zoom features
- And images slates and end cards (outro)
- Add transitions (fades)
- Split into sections
- Multiple clips
6: Publish your video
Now that you’re done with your video, it’s time to export it into a format you can use.
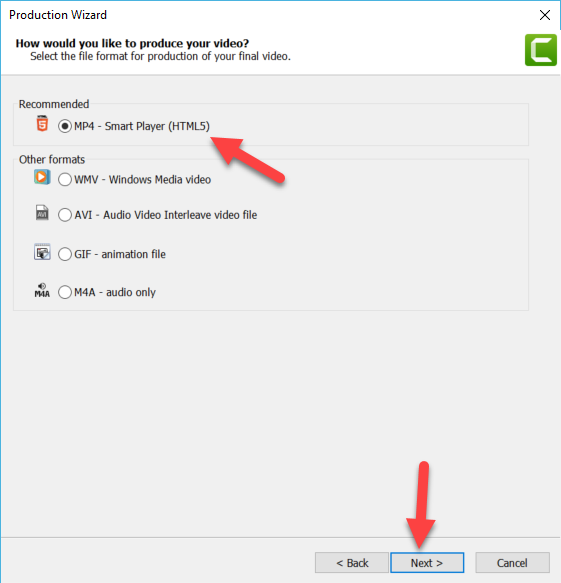
In the example below, we’re going to create an mp4, which is the file format most 3rd party video sites use (e.g. YouTube, Vimeo, etc).
If you’re uploading directly to an LMS, your settings will be different.
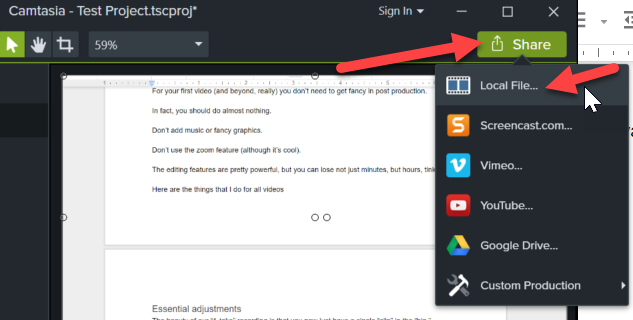
Click: Share->Local File
There are a bunch of screens you’ll walk through:
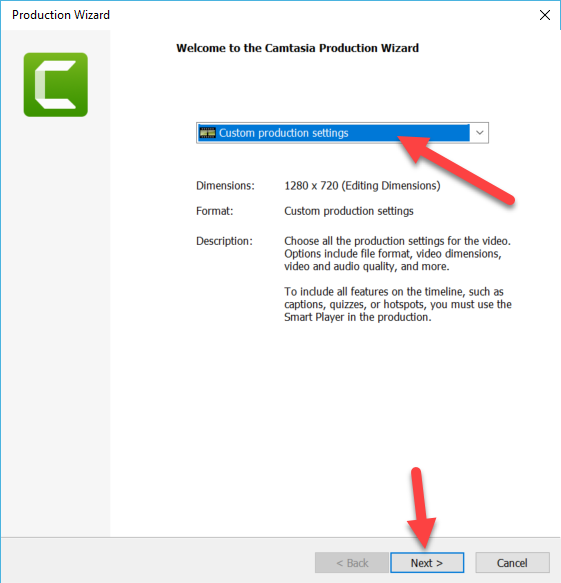
Select “custom production” here:
Select mp4 here:
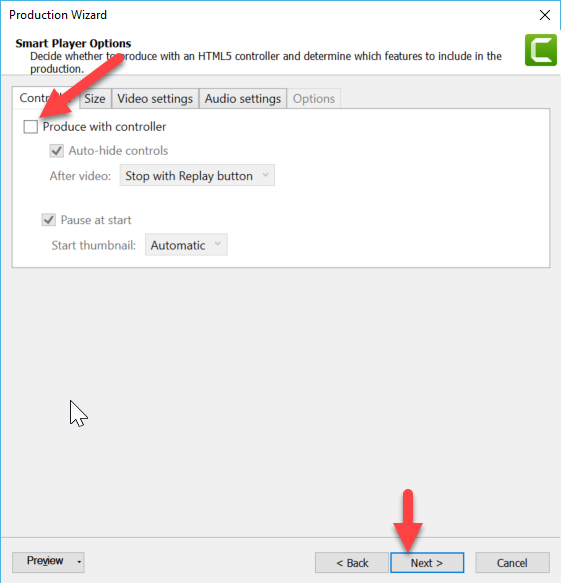
Uncheck the “controller” here (b/c YouTube, Vimeo, etc will have their own player):
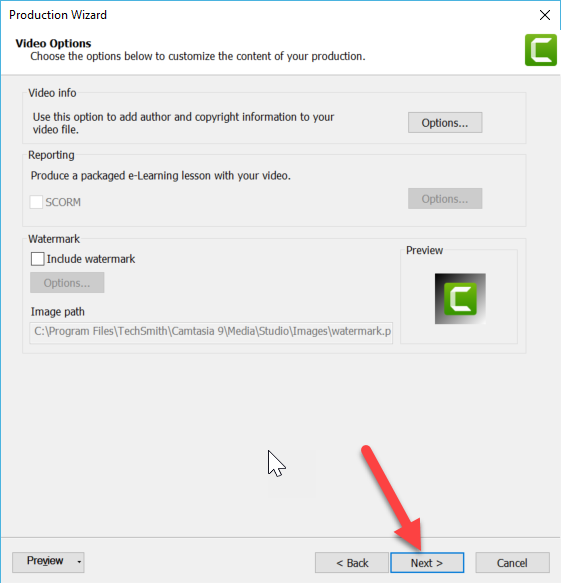
On the video options, just click next
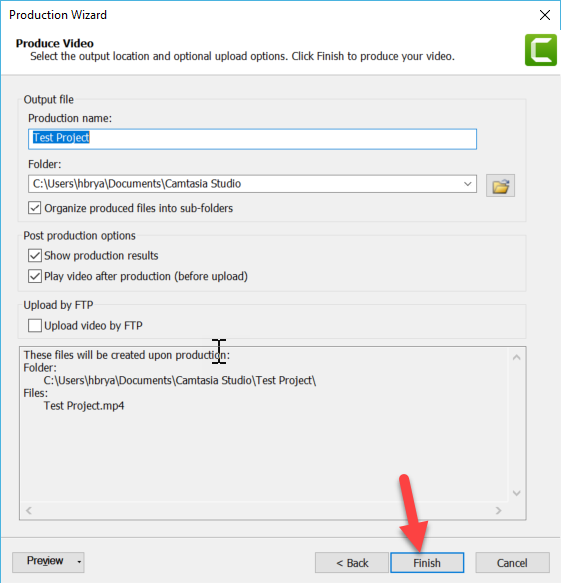
Leave the default “produce video” settings as is and click next here
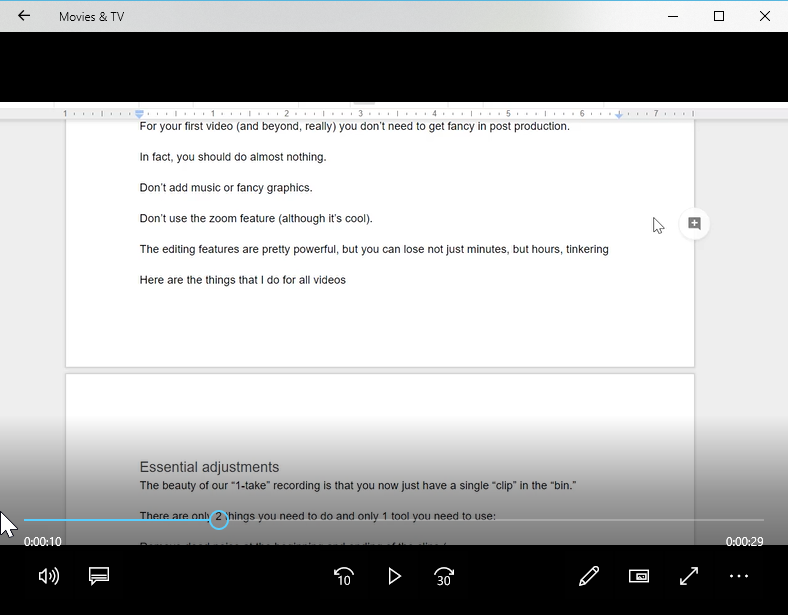
Your video will open in your default player:
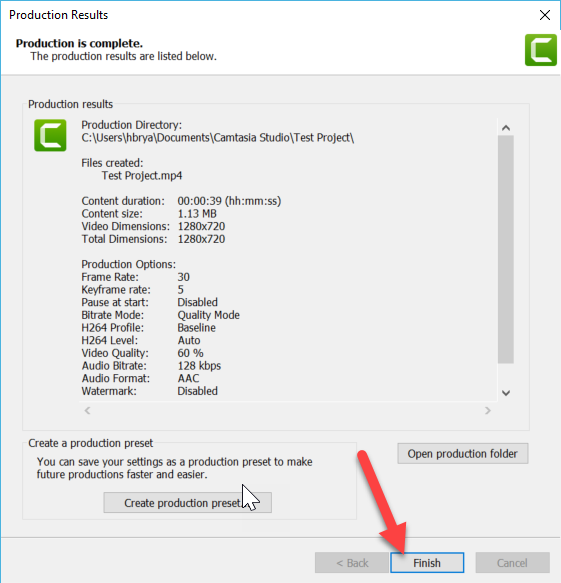
And you’ll see a summary where you can click “Finish”
7: Distribute your video
Now that you have the mp4 file, you can upload it to any video service, such as YouTube, Vimeo, etc
Congrats! You’re recorded and distributed a video screen recording tutorial!

