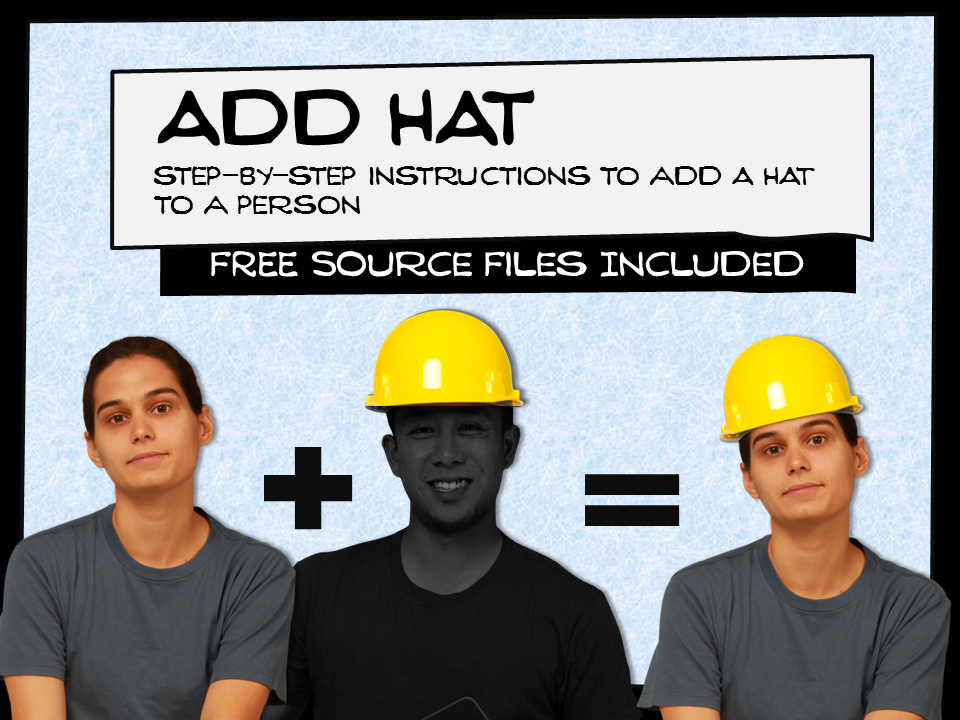
Sometimes you have an accessory or tool, such as a hat, that you’d like to add to a photo of a person.
Maybe you have this great photo of Meg, but you’re using her in a safety scenario to train factory workers. If she’s not wearing a hardhat, you’ll never hear the end of it from your trainees.
Don’t stress.
I’ll walk you through how you can make Meg totally safe using either PowerPoint or Photoshop.
This is a skill that you can learn in under 10 minutes. And it’s one that every eLearning developer should know how to do.
Adding a hat in PowerPoint
I always do a first pass at designing everything in PowerPoint. It’s my go-to design tool.
If I can’t do it in PPT, then I attempt it in Photoshop (and I get nervous b/c I’m just not that skilled in Photoshop).
Here’s a video screencast of me adding a hat using only PPT:
To summarize:
- Remove the background from a hardhat using the “remove background” feature
- Size and scale it to match your person
- Add a dropshadow for realism
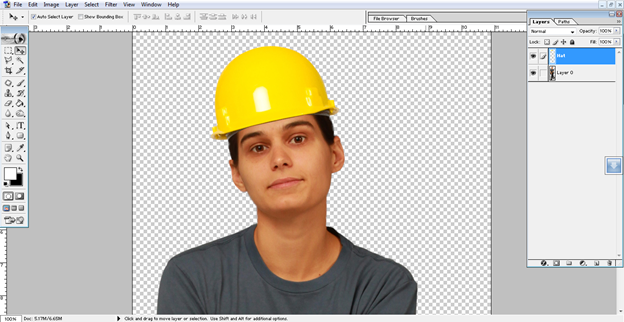
For you photoshop people, I had my graphic designer put together a screenshot lesson below.
Adding a hat in Photoshop
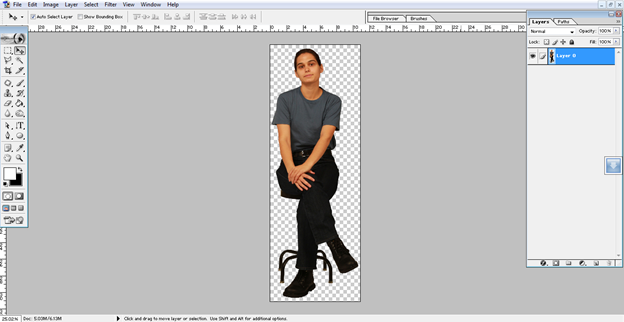
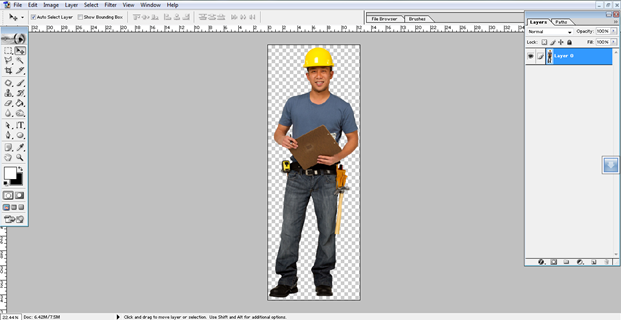
Step 1: Open the image you’d like to modify and an image with a hardhat
Tip: When selecting your image of the hardhat, try to match the side-to-side angle and the up/down angle so that it will like right on your character.
File->Open or [CTRL+O]
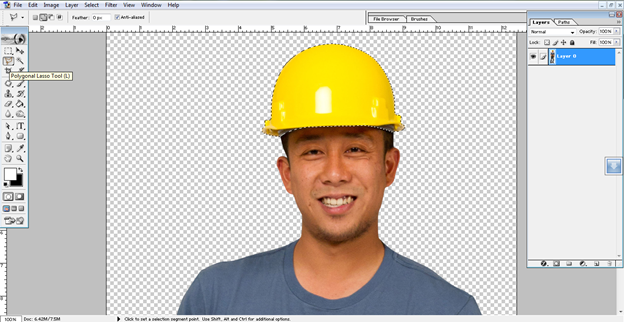
Step 2: Make a selection of the hardhat from the image and copy it
Tip: The lasso tool works well as a (selection tool) to cut the Hardhat from the image. Once you’ve made your selection, copy it “Edit->Copy” OR [Ctrl+C]
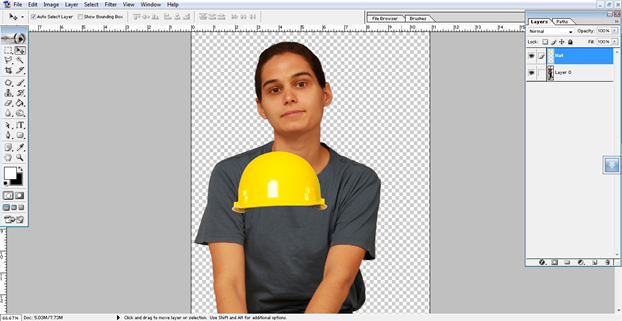
Step 3: Paste the copied Hardhat onto the image you’re modifying
“Edit->Paste” or [Ctrl+V]
Tip: You’ll notice that the pasted image shows up as a new layer in your layer pane
Step 4: Size and align the hardhat to the head image using the free transform tool
With the hardhat layer selected, use the Free Transform tool “Edit->Free Transform” or [CTRL+T] to size and rotate the image
Tip: hold shift key to keep the proportions the same when sizing
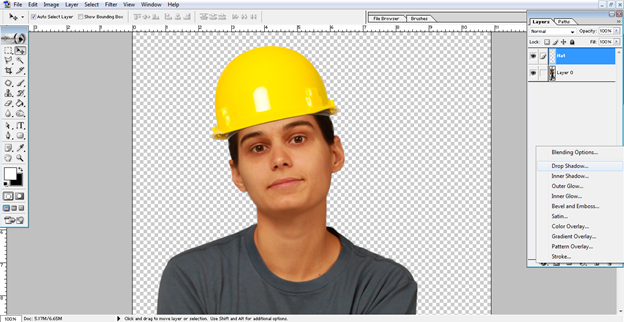
Step 5: Add depth to the image by applying a dropshadow layer style
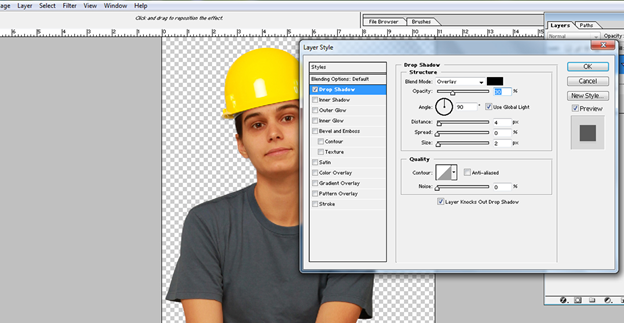
With the hardhat layer selected, click “Layer style” from beneath Layer panel and select the “dropshadow” option.
Set blendmode: Overlay, Angle: 90 degrees, Distance: 4, Size: 2. Note: This will vary by image.
Step 6: Save the image
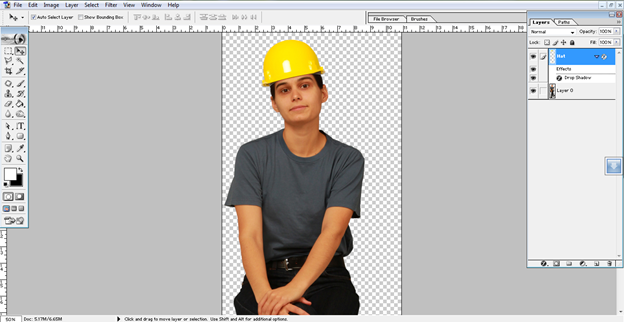
Below is the final image in PSD form. We’ll now want to save it as a common file type.
In our case, we’re going to save it as a .PNG so that we retain the transparent background. “File->Save As” or [CTRL+S]
Bonus step: Impress your colleagues with your new image and pat yourself on the back for making your images work for you!
What other practical tutorials would you like to see?
Adding a hat to a person is an important skill to have in your bag of tricks.
What other tutorials would you like to see me attempt in both PowerPoint and Photoshop?

