

xAPI is one of the more advanced ways you can deliver and track eLearning and other learning experiences.
But where do you even get started?
If you’re not doing anything at all with xAPI now, it can feel like climbing Mount Everest.
But let’s focus on just 1 step of that climb.
Here’s something actionable that you can do TODAY in about an hour to get started with xAPI.
Not a programer? Neither am I.
No budget? Everything in this tutorial is 100% free.
So let’s just do this right now, together!
xAPI Tutorial: 60 Minute Quick-Start Guide
Goal: Setup an LRS demo account and send your first statement to it
Time required: 60 minutes (+/- 30 minutes)
This tutorial is an abbreviated version of these two posts:
- Anthony Altieri’s Learning Solutions xAPI tutorial– Anthony- You are the man for sharing that code for us to copy, paste, modify, and test! No way I could have done that on my own.
- Mel Milloway’s 3 steps to xAPI LinkedIn post– Mel- You are a rock star for creating the tutorials (video and posts)! Keep them coming! 🙂
Overview
In the next hour, here’s what you’re going to accomplish:
- Understand the basics of xAPI via interview video with Mel Milloway (12 minutes)
- Set up a Learning Record Store (LRS) that can receive data from outside sources (10 min)
- Create a single-page HTML page test environment that is essentially a button that sends data to a LRS (15 min)
- Modify 4 lines of code in that HTML page that will connect the button to your LRS and look at the “statement” you’ll send to the LRS (15 min)
- Trigger your first “statement” by clicking the button, which will send data to your LRS (5-min)
- View the statement in your LRS (5-min)
1. Learn the basics of xAPI
If you’re already familiar with xAPI, just skip to the next step.
If you want to learn more check out this 11 minute xAPI overview interview with Mel Milloway:
And here’s a quick recap
Overview (start-2:23):
- What it xAPI: Data & analytics to track learning experiences and more. Anything, anywhere, anytime. Can be outside LMS, and even offline (e.g. in a classroom).
- Benefits of xAPI: Allows us to collect data with intention and a purpose
- How is xAPI different than SCORM? SCORM only tracks within a LMS and, even then, only some things (completion, success, failure, slides viewed, quiz results, etc).
Other highlights:
- Example xAPI project: Mel built a VR example that tracks back to an LRS. (2:24)
- View a Learning Record Store (LRS) (3:03)
- Sending a statement (4:55)
- xAPI wrapper and “verbs” (5:59)- username, password, endpoint
- How to get started: set up LRS and send a statement (7:25)
- xAPI Cohort (8:50)
- More about Mel (10:16): Connect on LinkedIn where she blogs, melslearninglab.com, Twitter @melmilloway
2. Set up an LRS to receive statements (10 minutes)
2A: Get access to an LRS (5 minutes)
1. Sign up for your own free “sandbox” account for YetAnalytics (free for 30 days… that’s 29 more days than you need!)
Note: You can use any LRS, but this tutorial uses YetAnalytics
It’s only 4 fields to fill out:
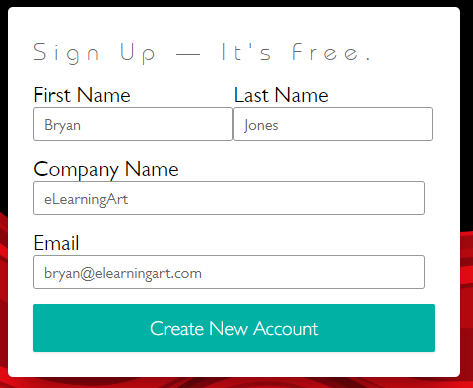
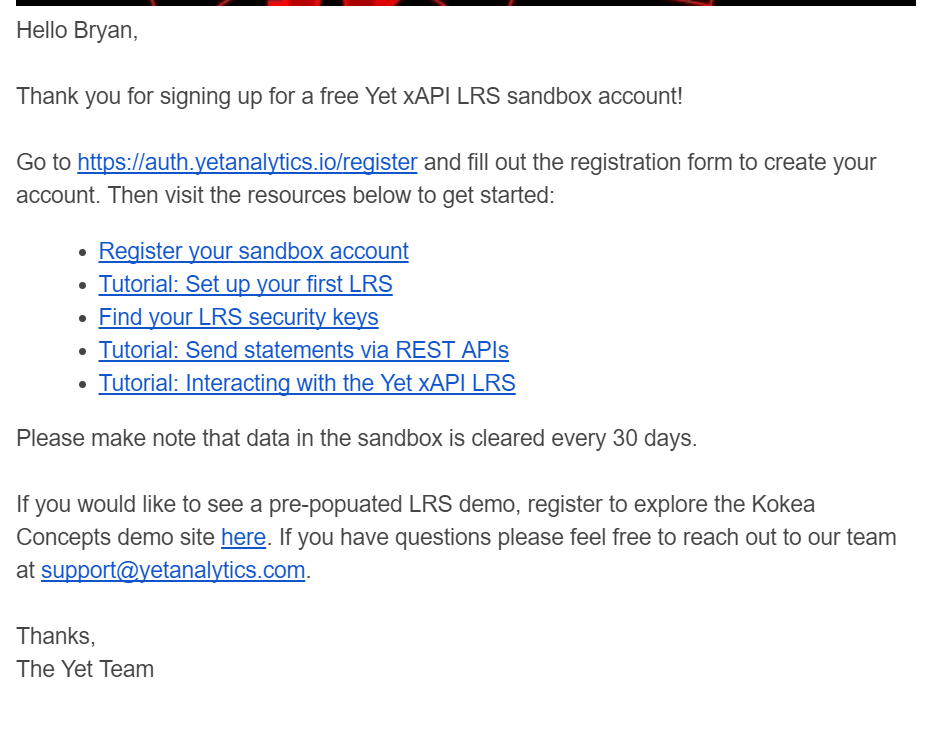
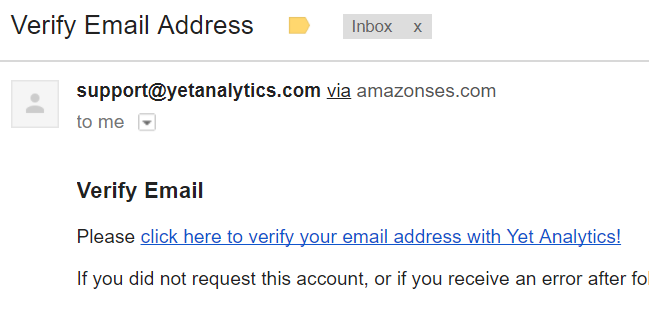
Check your email for further instructions:
Register your LRS- Just 4 fields
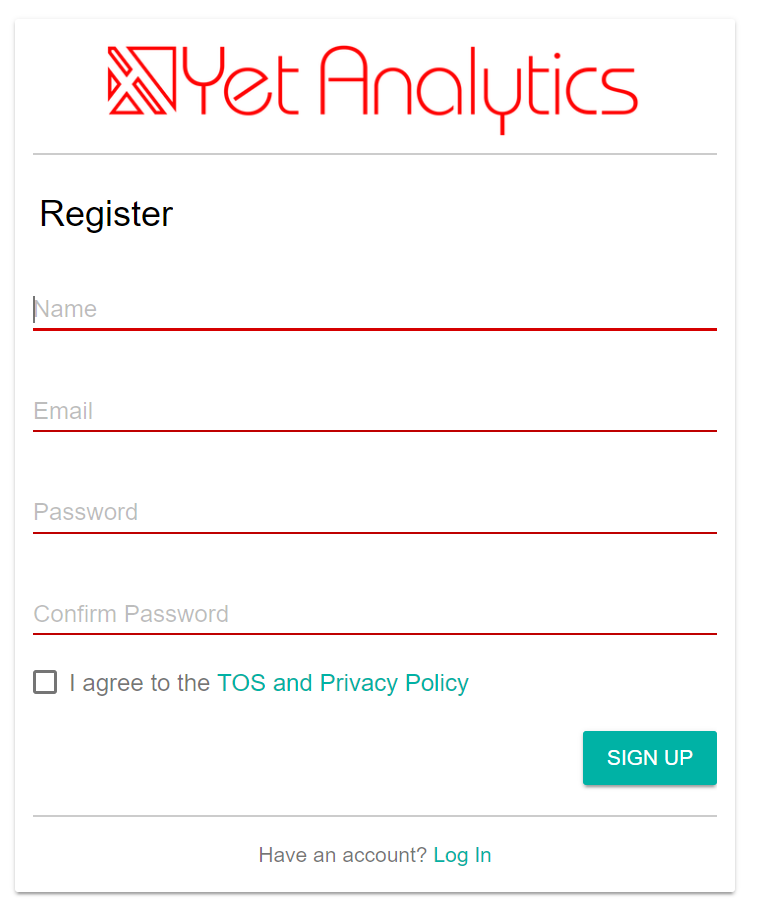
You’ll get a “verification” email you’ll need to click to finalize registration.
2B: Set up the LRS for xAPI statements (5 minutes)
Now that you’ve set up your YetAnalytics account, we need to do some minor setup and copy/paste some data for it.
You should have a default “instance” with your name and sandbox (if not, click the “+” icon in the upper right to create a new instance).
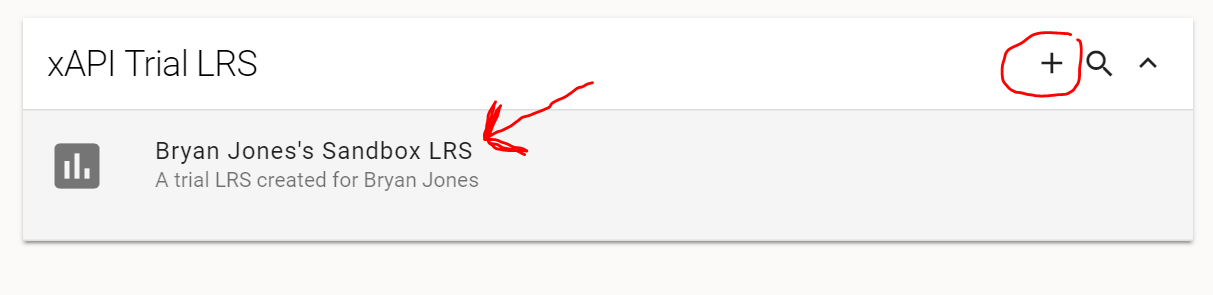
When I clicked it, it forced me to create a new “store” anyway:
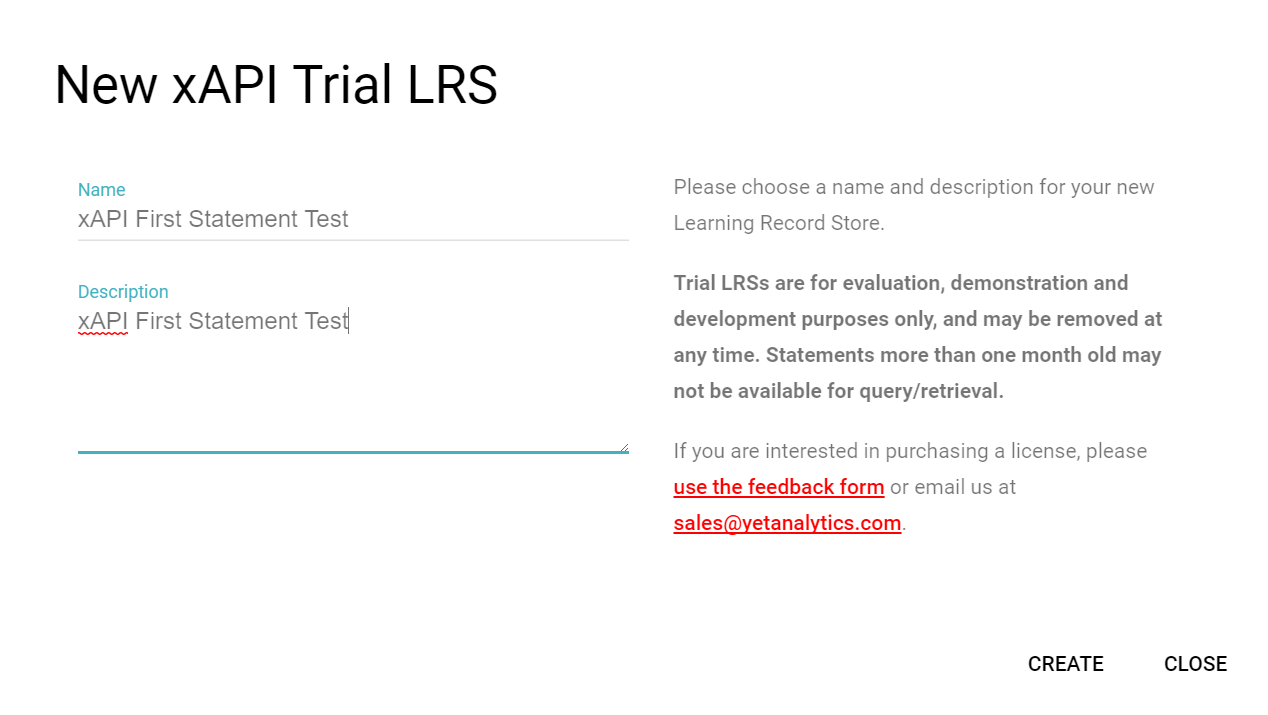
I named mine: “xAPI First Statement Test”
Then click ‘Create”
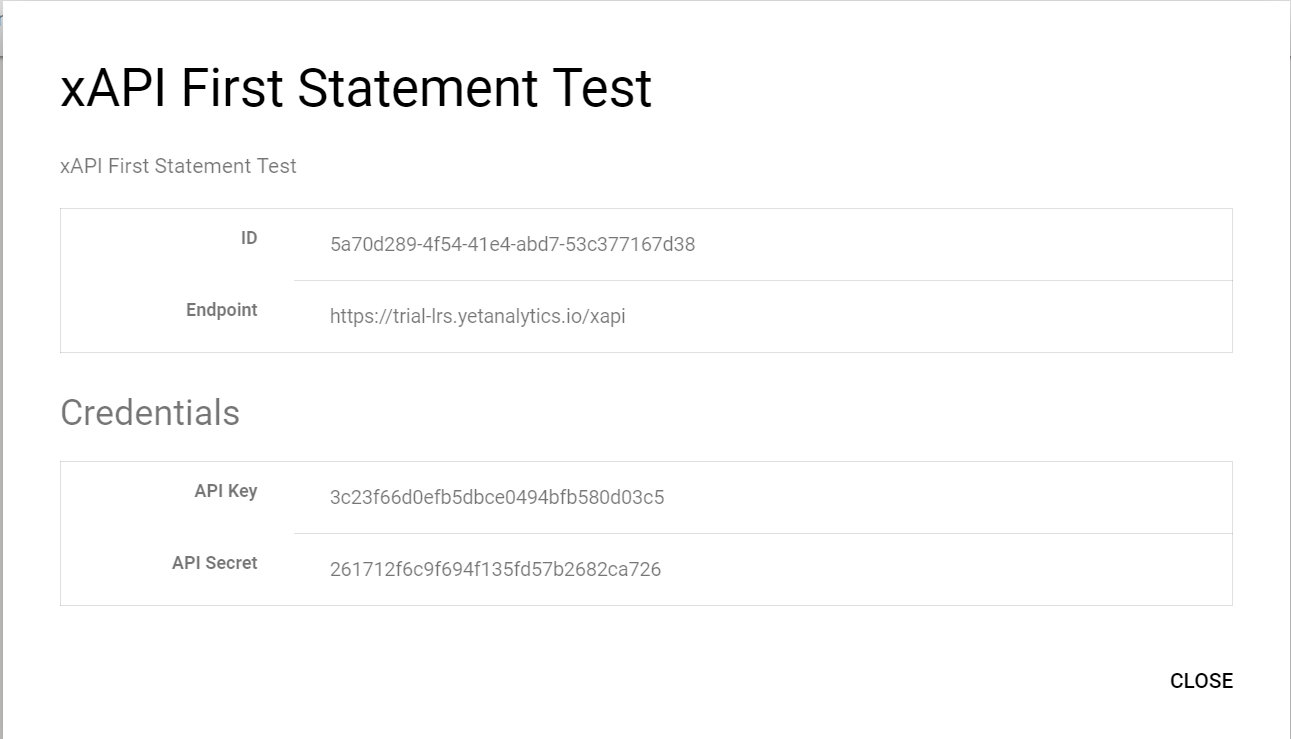
From this next screen, click “info:”
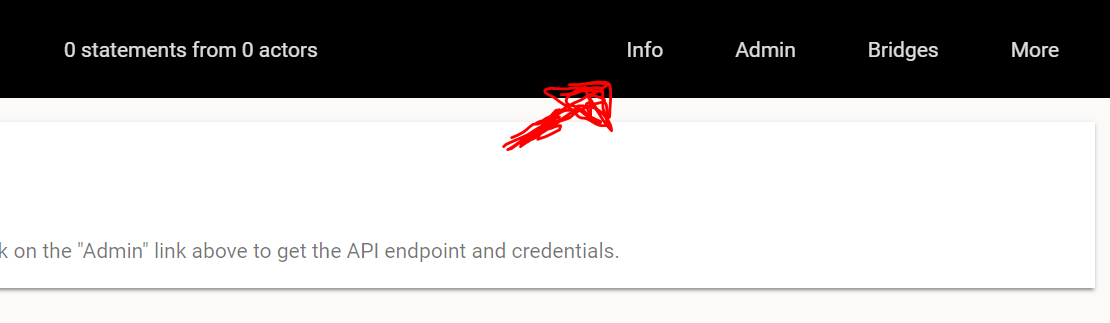
Copy and paste all of that info into a doc so that you can access it easily in the next steps.
3. Create your test website (15 minutes)
Here we’re going to create a test “learning event” that is happening outside of LMS. Imagine a learner is visiting some external site and taking an action.
So let’s create that fake website with an action that can track back to the LRS.
3A: GETTING STARTED (2 min)
You’re going to need a code editor. Mel uses Sublime Text in her tutorial, so let’s do that too.
Don’t worry. You don’t need to be a programmer to do anything here. Hang tight and I’ll show you.
In fact, here’s where we’ll start using an article from Anthony Altieri where he gives us the code and all we need to do is modify 4 lines. Thank you Anthony!!!
3B: CREATE A SINGLE HTML PAGE BY COPY/PASTING CODE FROM ANTHONY’S TUTORIAL (5 min)
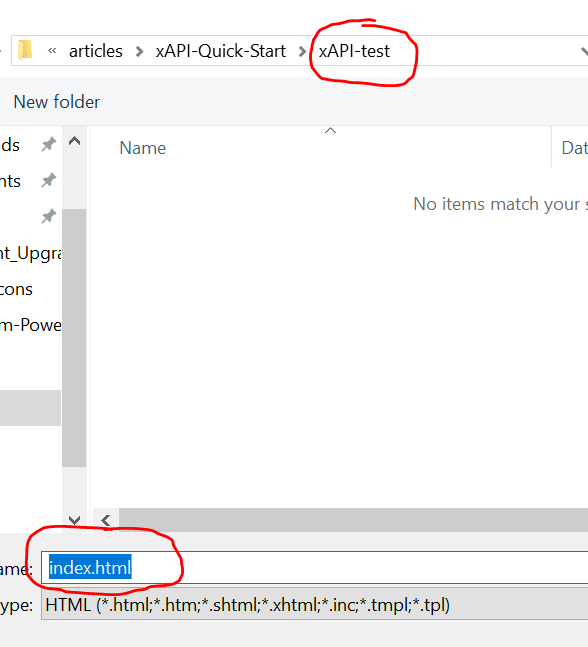
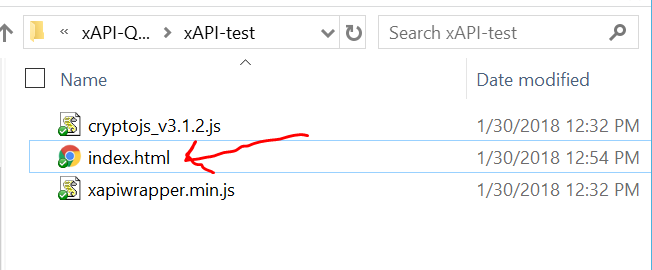
1. Create a new folder on your computer and call it: xAPI-test
2. Open Anthony’s article and copy the first batch of code in the “But I’m not a developer/programmer” section
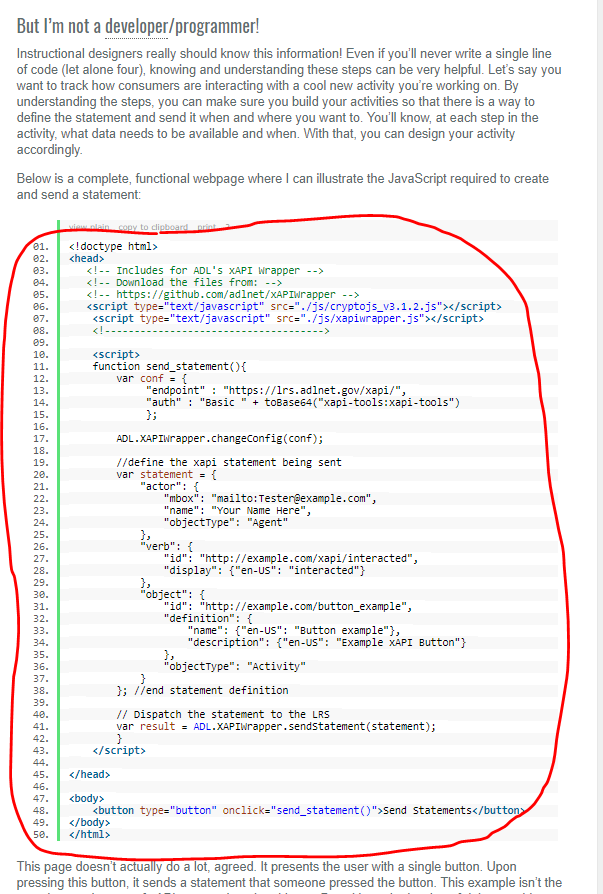
3. Paste it into Sublime text
4. Save as a .html document into your “xAPI test” folder and call it “index.html”
3C: INSERT TWO ADDITIONAL JAVASCRIPT FILES INTO YOUR “XAPI-TEST” FOLDER (5 minutes)
There are a couple of javascript files you’ll need to add to that same folder for Anthony’s code to work.
Go to GitHub for the xAPiWrapper
Click “Clone or download” and download the zip
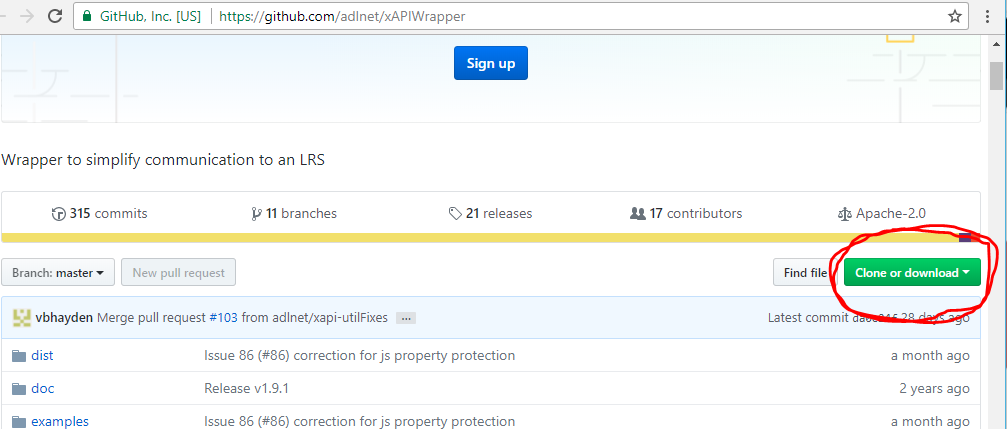
Unzip the file
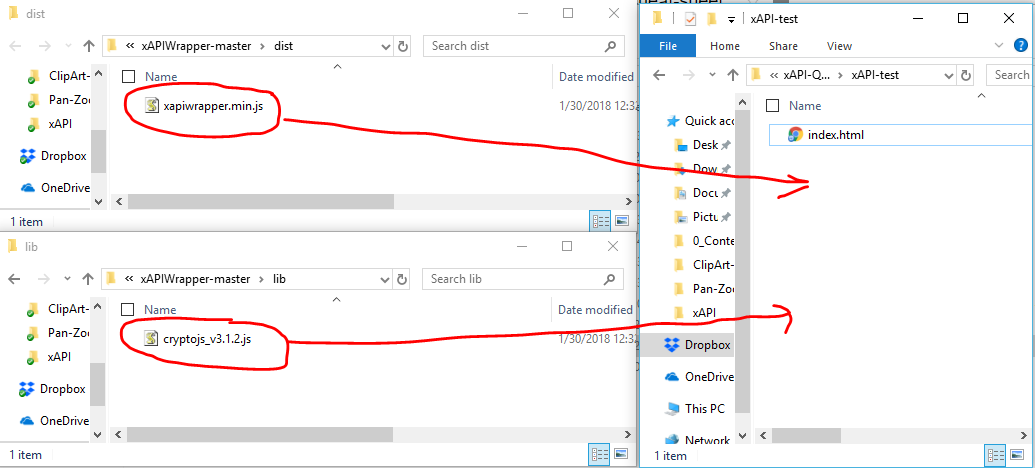
1- Get the wrapper file into your local folder
Go to “dist” folder
Copy the “xapiwrapper.min.js” file
Paste it into your “xAPI test” folder that you created
2- Get the crypto file into your local folder
Go to “lib” folder
Copy the “cryptojs_v3.1.2.js”
Paste it into your “xAPI test” folder that you created
Mel’s tutorial for finding these 2 files in GitHub is at 3:49 of this video.
3D: Check out your “local” website
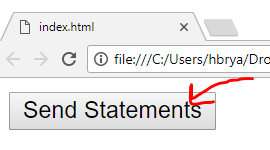
If you were to open this html page in your browser, you’d see that a button like this:

But it’s not connected to anything yet.
That’s what we’re going to do next.
4. Modify code to connect your “local” website to the LRS and send statement (15 minutes)
Open your index.html file in Sublime Text and get ready to pretend you’re a coder 😉
4A: Modify the script to tell the browser where the wrapper is (5 min)
Let’s just go ahead and point the index.html file to the 2 files you added to your “xAPI-test” folder
(Note: Anthony’s tutorial puts that info later, but let’s just do it while it’s fresh. Our test won’t work unless we do this.)
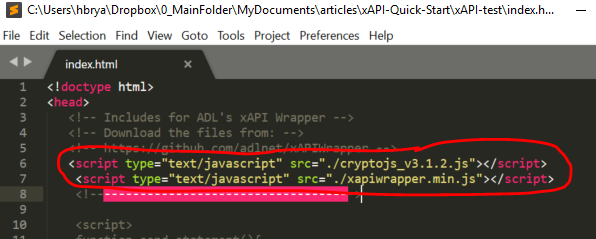
These two “script type=” lines are trying to point to the 2 GitHub files that you added to your folder. We need to point the browser to where to find these to files:
Your version may vary slightly from mine, so be sure to match the text you’re inserting with what the actual filename is. My names are:
- cryptojs_v3.1.2.js
- xapiwrapper.min.js
Watch Mel change the script names here at 3:49 of her video.
4B: Endpoint info- 3 things to change: URL, API username, API password (5 min)
You are “defining” a variable where the button will send the “statement” when clicked).
This info is the 3 things you copied and pasted earlier from your YetAnalytics LRS “info” page:
You’ll change 3 lines of code here
- Endpoint = The URL from YetAnalytics (mine was: https://trial-lrs.yetanalytics.io/xapi). NOTE: make sure you keep the backslash!!!
- API Key = username
- API Key Secret = Password
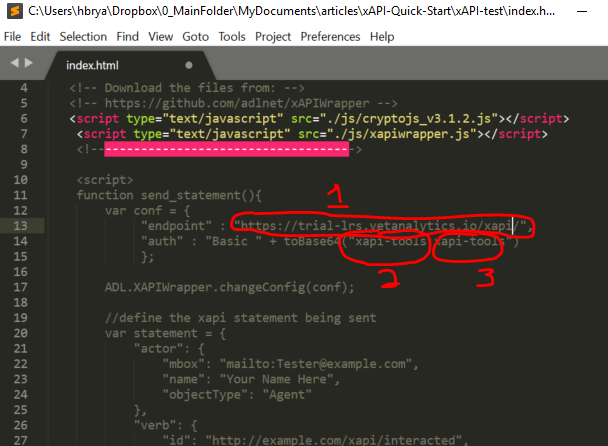
It’s a little confusing in Anthony’s code b/c he used the same string of text for both the username (API Key) and password (API Key Secret). Just know that before the colon, you’ll do the “API Key” and after the colon is the “Key Secret”
For a video tutorial, watch Mel change the endpoint info here.
4C: Create “variables” for the xAPI statement (LOOK ONLY)
There are a ton of different “statements” you can send to your LRS.
In thinking about the traditional course in an LMS via SCORM, you were limited to a few things (viewed it, completed it, and the score).
With xAPI, the sky is the limit. You can track online events (websites viewed, actions taken, etc), offline events, and more!
But for the sake of this tutorial, we’re going to create a simple statement.
When a user clicks a button on a webpage, that data will be sent back to the LRS.
You don’t need to do anything here. Anthony has already added some dummy data in there. As Anthony mentions, this is pretty simple version of an xAPI statement, but you can just leave it how it is.
But It’s a good idea to check out the code so you can see where the statement actually is.
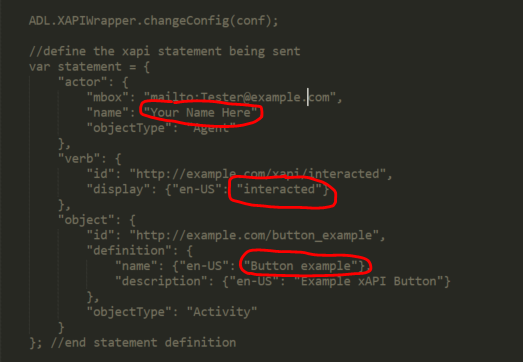
This statement is going to pass 3 pieces of data from the website to the LRS.
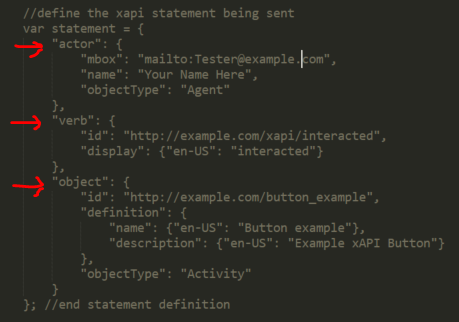
Here are the 3 important things:
- Actor: an email address is the identifier ang then “Your Name Here” would be the name associated with it. You’ll see in my LRS report at the end that the actor reported is actually “Your Name Here” because I didn’t change it. If I changed the name, it would flow through to the report
- Verb: The action here is “interacted.” That’s what you’ll see in the report.
- Object: Our button named “button example” is our object that triggers the statement when clicked
This is what’s going to get pulled into your LRS when you when you send the statement.
5. Trigger the statement through a learning event
Now that you’ve created the statements and tied the site to your LRS, you’ll need to trigger an event that will send that statement to your LRS.
1. Go to your “xAPI-test” folder and open the “index.html” file with your browser (I’m using Chrome)
2. Click the “Send Statements” button
Note: You may want to have Google Chrome inspector open so you can see if there are errors.
Watch Mel open the file with the Chrome inspector here.
6. Run a report on the statement
Now that the event has been triggered, go back to your LRS to verify.
Open up YetAnalytics
Go to the Store you created
Scroll down and you should see some analytics
The button click should send you something in your “Activity stream

You’ll notice the actor (Your Name Here), verb (Interacted), and definition (Button example) all come from the statement code that Anthony created for us and we looked at in the steps above. Here it is again:
Watch Mel check out the report in YetAnalytics here.
6. BOOM! YOU JUST CREATED, TRIGGERED, AND REPORTED A STATEMENT VIA xAPI!!!
Nice work. Now the statement you just sent was pretty simple. But it walked through the basics…
You set up an LRS…
You tied an action (clicking a button) to the LRS to record that data…
This is just one statement and one user sending.
Remember, you can create statements for tons of different activities
And when you set the parameters in those statements, you LRS will be able to tie that activity to a specific user.
Pretty cool.
xAPI Resources and Next Steps
Watch Melissa Milloway’s xAPI videos
A special thanks to Melissa Milloway who was kind enough to do the follow-up interview and to guide in the next steps. You can see a series of tutorials she has done on LinkedIn. And check out her xAPI/VR project.
Sign up for the xAPI Cohort
If you want to do some hands-on xAPI exercises, you should join the xAPI Cohort that runs 2-3 per year. It’s a FREE, vendor-neutral, open group that meets via web conference every Thursday at 11am PT for 12 weeks.
Do an xAPI deep dive
Here’s a good article if you want to do an xAPI deep dive into understanding “verbs”

